Ngrok is a service or tool that allows you to turn your local server into a server accessible via a subdomain randomly generated by ngrok, enabling you to view it from any computer with internet access worldwide.
This is very useful to show progress to your clients on a website, or similarly, malicious hackers use this service to clone fake sites and perform phishing in just minutes. This can be done manually through your router, but it takes longer; with Ngrok, it can be done very quickly. You just need to download Ngrok, open the terminal, and enter the following command:
\$ ngrok http 80 and the following will appear:
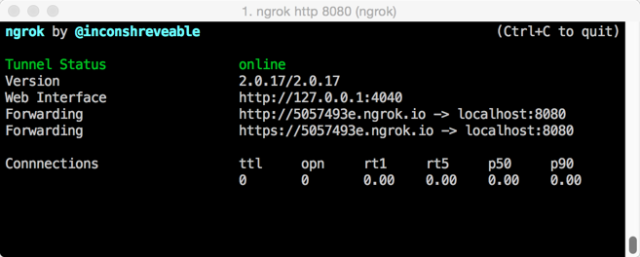
Basically, what Ngrok does is create a TCP tunnel to expose what is inside the localhost. If you have previously installed MAMP, LAMP, or WAMP, Ngrok will create a random dynamic subdomain and show to the world (internet) what is inside your localhost (the applications you have in MAMP, LAMP, or WAMP).
Ngrok has a free version and a paid version. In the paid version, you can configure permanent subdomains, while in the free version they will be dynamic.
To install it:
- Within Kali Linux or wherever you want to install it, open the browser and go to www.ngrok.io
- To download it, you need to create an account; if you don’t want to use your email, I recommend using the temporary email tool at www.mohmal.com
- On the ngrok page, the system will detect your OS, so click download for the operating system where you want to install it.
- Go to the folder where the zip file is located and open it to extract the file inside the zip called “ngrok”
- In the terminal, go to where the “ngrok” file is and paste the command from step #3 on the ngrok download page; it looks something like this: $ ./ngrok authtoken 1DbV8rlHa6P3SFAGOdvJKsvOsdfS3g_7di6AfsSEJsdfCnFPNoRF16o
- A message will appear confirming that you installed it correctly.
- Now to test it, type the following command in the terminal: $ ngrok http 80

 Español